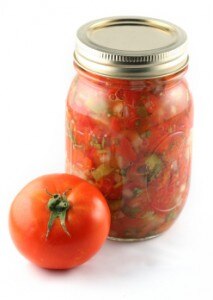
With summer coming to a close and fall just around the corner, the abundance of fruits and vegetables can be overwhelming. I start to panic a little when I think of saying goodbye to some of my favorite foods until next year! Of course, there’s always canning””but the idea of spending days in the kitchen putting up case after case of tomatoes always seemed a bit “out of my league.” Then I read something about small-batch canning.

Small-batch canning is exactly what it sounds like””preserving vegetables or fruits in small batches. It’s less stressful, making it ideal for beginners. It’s also perfect for trying out new recipes (who wants to end up with a pantry full of something that didn’t turn out quite as expected?).
I decided I’d take on one small batch a week. I worked with my local organic farmers to buy bulk fruits and vegetables. Next, I planned my calendar based on what was fresh locally, aiming for farm to can in two days. Then I got to work!
Here are my secrets to successful small-batch canning:
Supplies:
1 large pot for canning (4″ taller than your tallest mason jar)
1 large pot for blanching
Large bowl (for ice bath)
Funnel
Mason jars and lids
Lemon juice
Canning tomatoes:
As a basic rule of thumb, 20 pounds of tomatoes will give you 7 quarts. Once I got the hang of it, I started making two to four 7-quart batches per week through the season (five weeks or so). Four batches takes about three hours of time total (and I multitask and make dinner at the same time!). This usually gives me what I need until next season.
Getting ready:
- Use dishwasher to sterilize jars and lids.
- Fill your canning pot (4″ taller than your jars) with water to the half-way point and place on stove.
- Fill your blanching pot with water to the ¾ point. Place on stove.
- Place a large bowl (I used my bread bowl) in your sink to use as an ice bath. When ready to use, fill with cold water and ice.
- Place clean jars and funnel next to ice bath. (Be sure to use the funnel to fill jars!) Keep lids in warm dishwasher until ready to use.
Start canning:
- Set up as suggested above. Bring blanching pot water to a boil.
- In small batches of 6 to 7, blanch tomatoes; place in ice bath.
- Remove skin and tops from tomatoes.
- Use funnels to fill mason jars””be sure to pack tightly.
- Add a tablespoon of lemon juice to each jar.
- Run a knife along inside of each jar to remove air bubbles.
- When 7 jars are full, wipe rims and place warm lids on top with rings.
- Place jars in canning pot and add additional water so jars are covered by 1″.
- Cover pot and bring to a boil for 30 minutes.
- Carefully remove jars from canning pot (I use a canning tool).
- Listen for the wonderful pop, pop, pop!
 Easy Tomato Sauce
Peel and puree tomatoes to make a vegetable only sauce! I stick to an easy, basic sauce with onions, garlic, lemon juice and may family’s favorite herbs.
- Sauté onion and garlic in olive oil.
- Add tomato puree and rest of ingredients; stir well to blend.
- Cook on low until mixture is reduced by half (about 2 hours), stirring occasionally.
- Use funnel to add sauce to hot pint size jars. Clean the rims and seal.
- Process jar for 25 minutes in boiling water bath.
More canning tips:
- Use your dishwasher to sanitize jars and lids (saves time over boiling)
- Prep veggies and fruits as directed for best flavor
- Use small jars for individual or “snack size” servings
- Use a knife along edges once jars are filled to remove as many air bubbles as possible
- Lids may not pop while in boiling bath but once removed you’ll hear the glorious pop, pop, pop a few minutes later
- Always wipe down jars before storing””they may be sticky
